Explore the World of Constructions with Chemical Anchoring
- akpremakumara

- Oct 25, 2020
- 4 min read
Updated: Mar 7, 2021
What is Chemical Anchoring?
Chemical anchoring is a methodology which allows to insert and bond the reinforcements to concrete or similar substrates/ compounds in construction activities. In vast general there are 2 types of anchorage methods which identified as
1. Mechanical Anchors
2. Chemical Anchors
In conventional mechanical anchorage systems, some limitation and difficulties are identified in installation and gaining the required strength over the process of construction activities. In order to overcome these limitations and smoothen up the installation process, more advanced yet effective chemical anchorage systems have been utilized in modern construction activities all over the globe.


(Please note that numbers indicated in the above pictures are with the reference of advantages mentioned below)
Procedure
Step 01
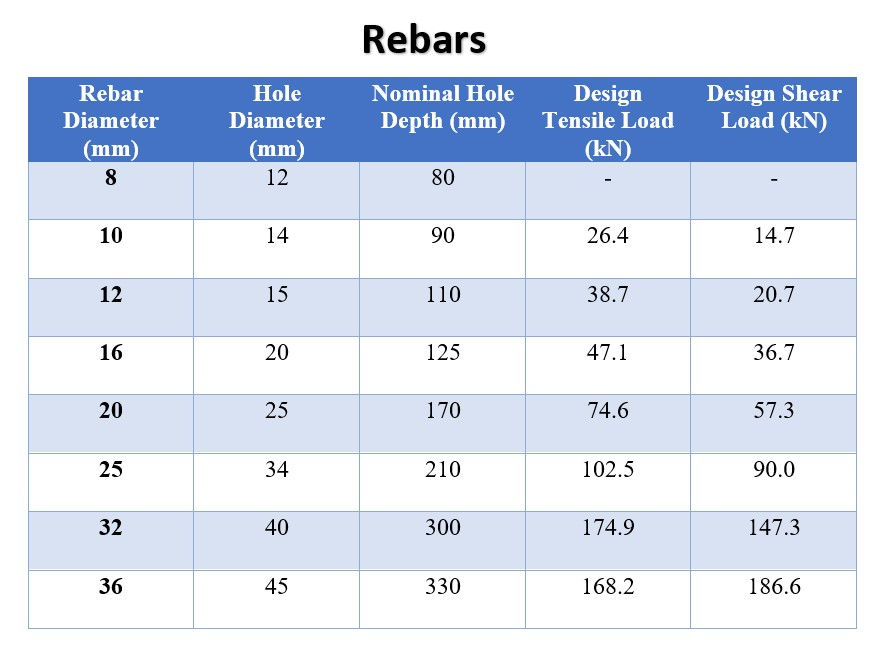
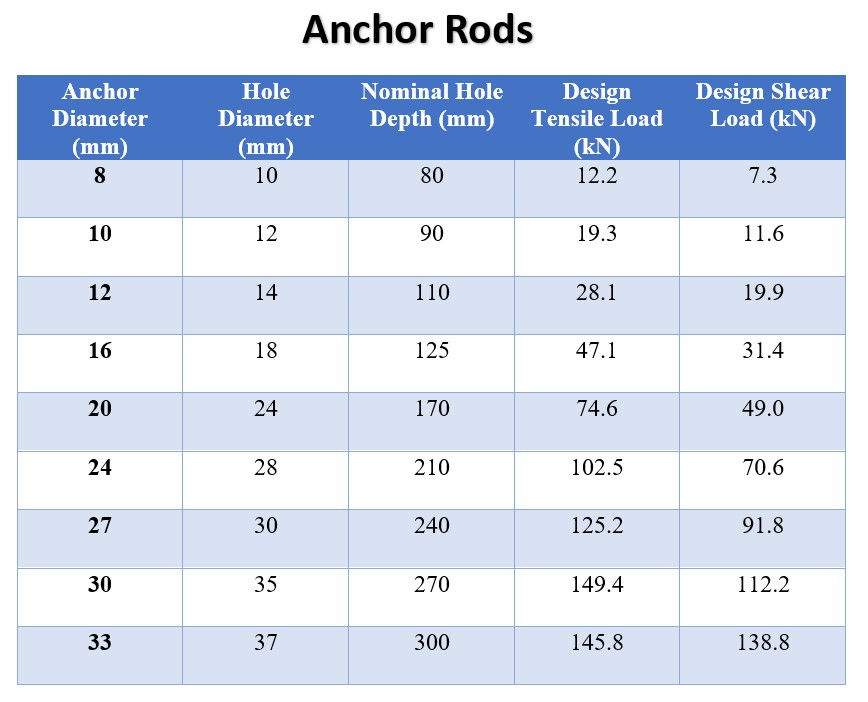
Determine the required drilling depth and the diameter of the drilling rod
The provider of the chemical resin delivers the required depth accordance with the diameter of the bar to be inserted, with the product details.
The following table illustrates the details of the bar diameter, required depth, diameter of the drilling rod. etc. for steel reinforcements (Rebars and Anchor Rods) vastly used in local construction industry.
Step 02
Achieve the required depth by drilling into the concrete/ Substrate compound. (Advisable to use a Hammer Drill for the convenience)


Source - images/amazon.com
Step 03
Cleaning the hole of drill dust, cement, debris. etc. using a manual air pump and special brush.
Without the proper cleaning the bonding between the rebar/anchorage with the concrete will not reach the required capacity.
Insert the tube of the manual pump to the drilled hole and pump until the noticeable dust have been dissipated.
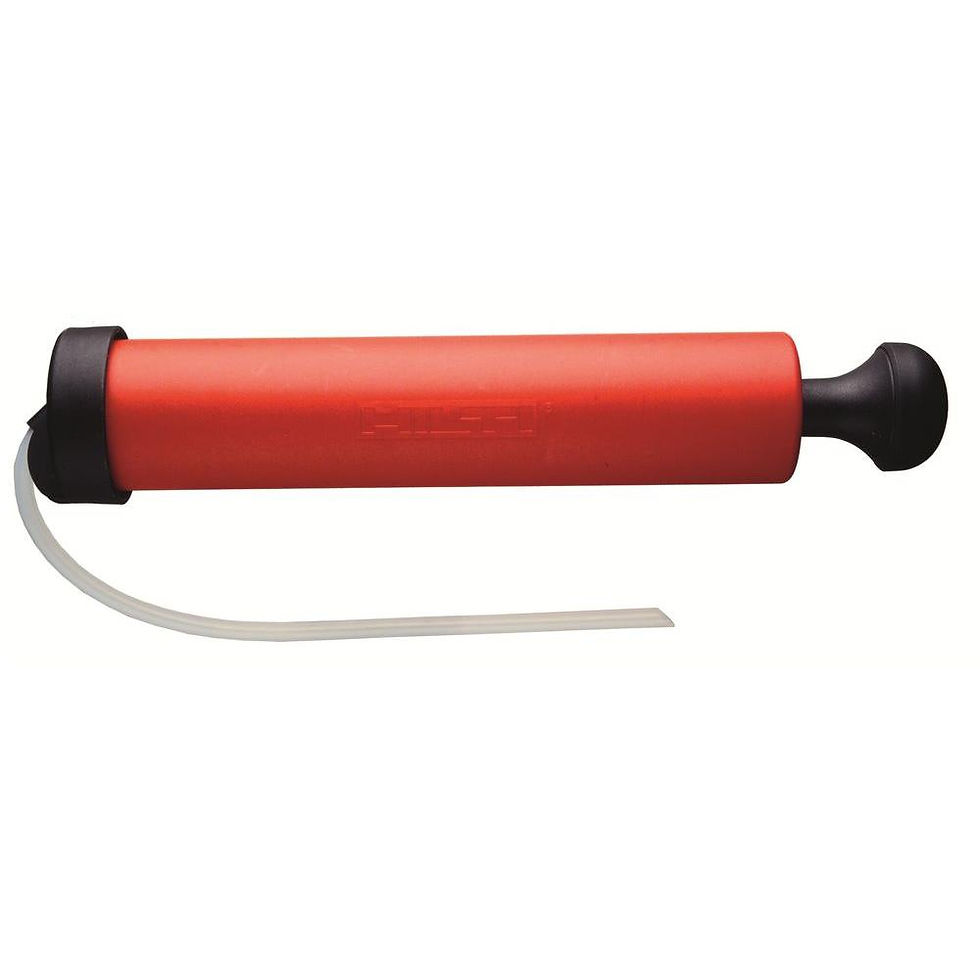

Source - Epoxy accessories/
homedepet.com
2. Brush the hole at least 4 times (twisting motion) using a brush having less diameter of the drilled hole.


Source - Epoxy accessories/ Source - dreamstime.com
homedepet.com
3. Use the manual pump again to clear out the remaining dust by utilizing at least for 4 times.
Step 04
Preparation and loading of the epoxy and resin into the chemical gun.
Attach the nozzle to the gun (Do not modify the nozzle under any circumstance)
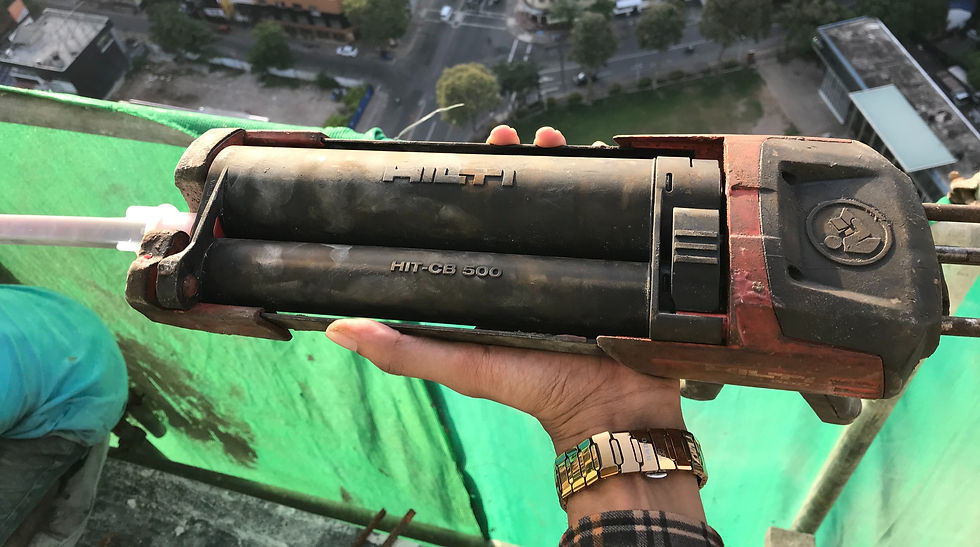
2. Load the chemical pack into the gun.


Source - Epoxy accessories/
homedepet.com
Chemical pack contains 2 compartments where one contains the epoxy resin (larger pack) and other contains the amino hardener (Smaller pack). Keeping them apart will avoid the chemical being hardened prior to the utilizations.
3. Discard the initial adhesive/chemical
This step need to followed when only a new chemical pack has being inserted to the gun.
The initial adhesive from the gun considered not to be mixed properly, therefore will not gain the required bonding properties over time. The amount which need to be discarded is usually provided by the seller (by number of strokes) or otherwise determined by visual inspection. (Visual inspection - When the 2 chemicals have mixed properly, it will perform a solid color, Ex:- HILTI - Pink)
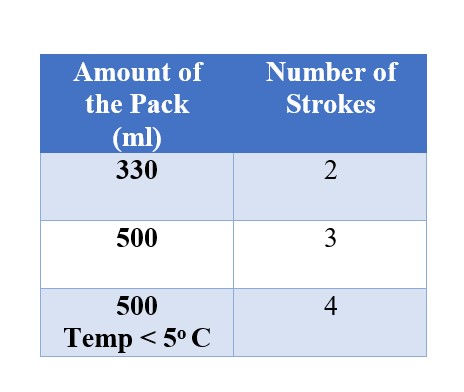
No. of Strokes Required to discard the initial adhesive
Step 05
Injecting the adhesive to the drilled hole.
The amount which need to be used to fill the hole is usually provided the by the seller. Typical filling amounts utilized in the local construction industry for rebars and anchors are illustrated below,

Amount of the chemical/adhesive needed to be filled in the hole
2. In the constructional environment, measuring the required amount proves to be hard and ineffective. Therefore common practice is to fill up the hole up to 2/3rd of the
depth of the hole.

3. No of strokes required to fill the required depth varies with the drilled depth. Therefore its advisable to insert the nozzle to the very depth of the hole and start filling continuously in the outward direction.
4. After completion of injection, press the release trigger in the gun which prevents further dispense of the adhesive.
Step 06
Inserting and Setting of the Element (Rebar/Anchor Rod)
The bar or the inserting element need to be dry and free of contaminants such as oils, debris. etc.
2. When the element has being inserted to the hole, the excess adhesive need to be spelled out. This visual inspection is utilized as a thumb rule in the construction practices. If not, more adhesive needs to be injected to the hole.

3. In Local conditions inserting and adjusting of the elements is allowed only within the first few minutes after the adhesive injection. Therefore it's advisable to insert the element as soon as the the adhesive being injected.
Step 07
Loading/ working the element
The time which the chemical required to be cured after the injection and installation, is specified by the seller.
The typical curing data utilized in local construction industry are illustrated below.
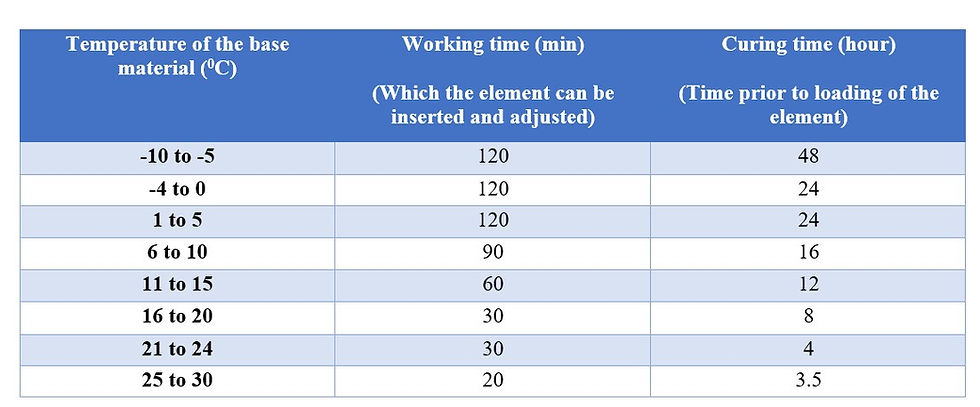
Working time and curing time of the elements
In local practice, usually the inserted elements are allowed to be cured for a minimum of 6 hours, due the pattern changes of the weather and other temperature governing factors in the site.
Advantages
1. Large range of anchor and rebar sizes allowed to be utilized.

Source - constructor.org
2. More flexible than mechanical anchoring.
Since the anchors can be worked as desired, up until the working curing time, installation is much conventional in difficult conditions.

3. Can be installed near the edges as well, since no/minimum edge cracks will be induced unlike in mechanical anchors.

4. Can be utilized in many types of base material.

Source - popular mechanics.com
5. Protect the the element (Rebar/Anchor) from corrosion due to moisture from substrate/ base material.
The injected adhesive contains waterproofing properties, which prevents the exposure of the anchor to the moisture.

Source - dreamstime.com
6. Due to the liquidlike property of the adhesive, it flows and fills the discontinuities and the imperfections in the base material. This property also helps in filling up the drilled hole which is highly benefitable with respect to mechanical anchors.

Source - Stockadobe.com
7. Even stress distribution will be available with the molecular bonding properties.

Source - designfix.com
Leading Suppliers
HILTI
FINEX
GU FIXINGS
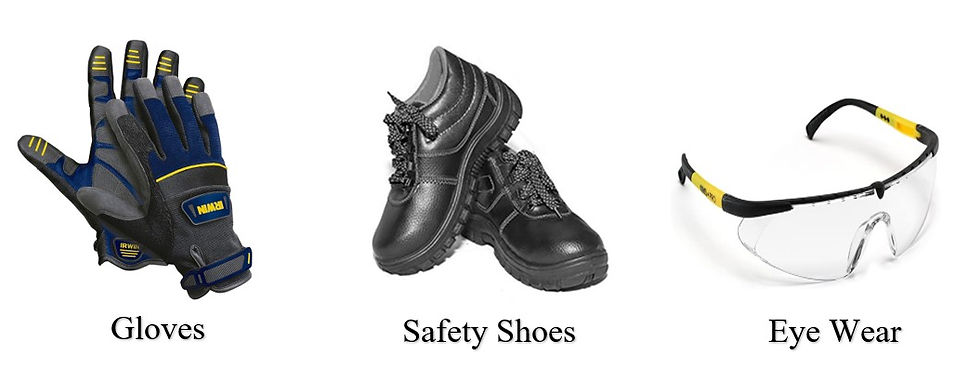
Safety
1. All the workers should wear Personal Protective Equipment through out the whole operation.
Source - images/ amazon.com
2. In case of direct contact of the chemical with the skin, wash away the chemical as soon as possible, with flowing water. if the affected area shows signs of an allergic reaction, seek medical expertise immediately.
3. Never expose the naked eye to the chemical. (Could implement severe damage to the vision)
4. Use a new nozzle/mixer for each pack to avoid the development of unnecessary pressure inside the gun.
5. Do not modify the mixer/chemical under any circumstance.

Source - prosignsdirect.com
References
www.homedepot.com
allfastners.com.au
gooduse.com.wi
fincoengineering.com
www.hilti.com
( All the content in this article is protected under the intellectual property act No. 36, 2003 )


Comments