Ensuring the Quality of Concrete - Slump Test
- akpremakumara

- Nov 8, 2020
- 4 min read
INTRODUCTION
Concrete is to be known as one of the vastly used construction material (Cement, Fine Aggregate, Coarse Aggregates, Water) , all around the globe. Construction industry is always keen on proceeding their activities with concrete due to its',
Higher Strength Properties (Specially in Compression)
Greater durability in normal and adverse conditions
Lower cost in implementation
Excellent insulation properties upon vibrations and noise
Recyclable nature upon the end of service life
Low Maintenance cost, etc.

Source - Chaiyaporn1144/iStock/Getty Images Plus/Getty Images
Historical observations suggest that, the usage of concrete in construction practices predates back to the period of 4th Century BC. Since then, the compositions in concrete has been improved in many aspects to match with the complexity of the requirements adduced by the modern society.
Global construction industry has undertaken a high momentum in last few decades, changing its' face from conventional single/double story buildings, to 50-60 story high rises with the presence of tremendous aesthetic appearances as well. Most of these constructions are based on concrete, as their fundamental construction material. In such circumstances ensuring the quality of the concrete is essential since, it directly affect the strength and durability of the structure which is to be taken place.
This article describes about a common concrete test (Slump Test), carried out in sites, to ensure the quality and the consistency of the concrete.
SLUMP TEST
Slump test is known to be the most common yet essential test utilized in any concrete casting site, which gives an idea about the
Consistency and
Workability
of the concrete while giving the observer an opportunity to detect any inconsistencies, could have taken place in batch mixing as well.
(Not suitable for concrete consisting aggregate sizes over 40 mm)
Apparatus


Source - Panaisran.com
Slump cone and Apparatus


Source - superlink.store/topex.com
Source - amazon.uk

Source - Aliexpress.com Source - wheelchair blogger
Procedure
Step 01
Setting the base plate and the slump apparatus/mould properly.(It's important make sure that the base plate is horizontal)
Make sure the base plate and the mould are dampened before proceeding to the next step.

Source - readymix2.go.co.uk
If the underlying surface is not even, it is advisable to use sand/gravel type material to achieve a horizontal surface.
Step 02
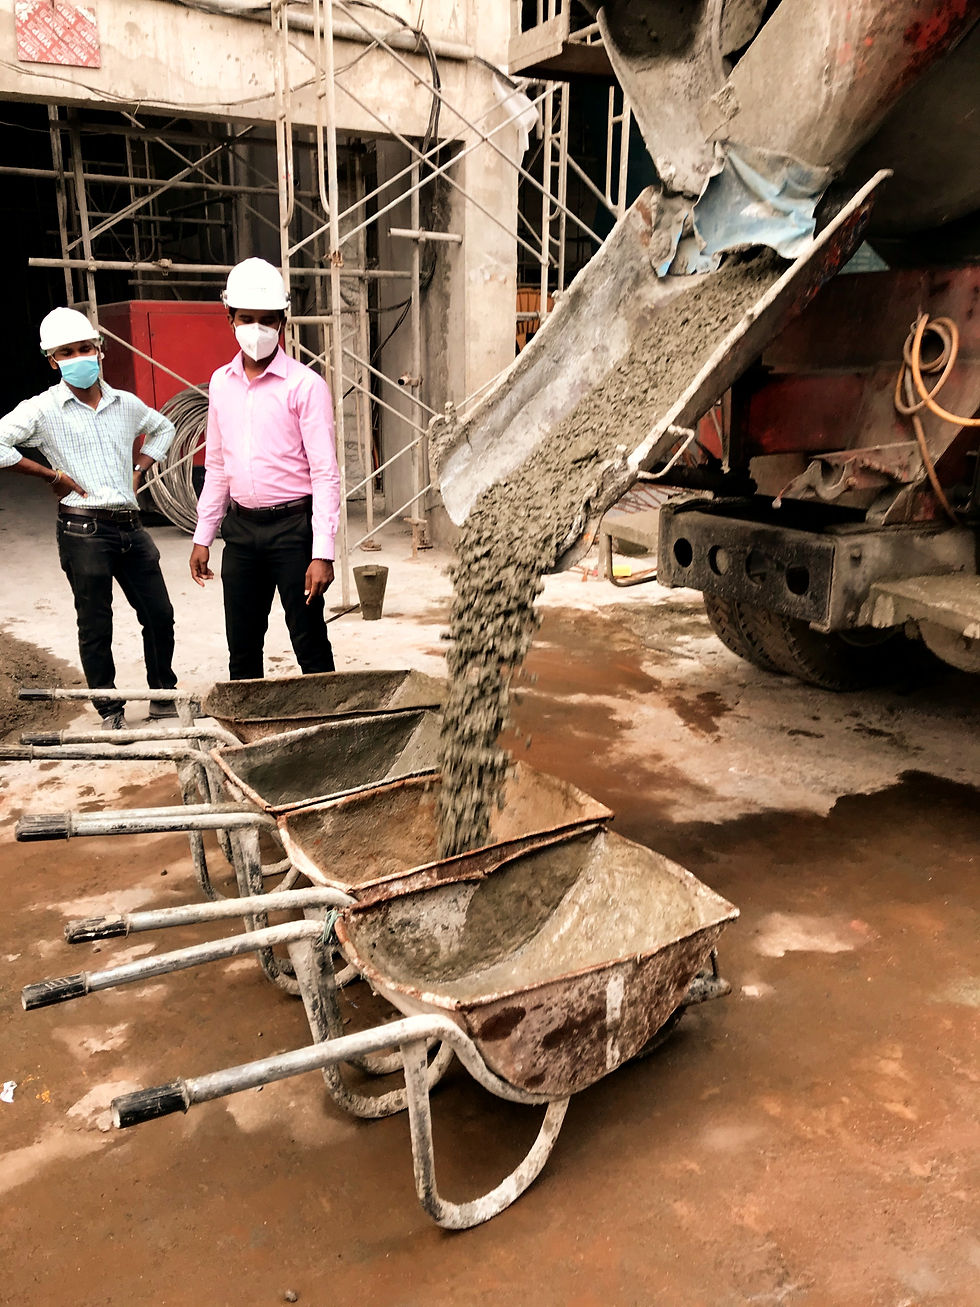
Take the concrete into the remixing container/wheelbarrow from the delivery truck. (Make sure, not to use the initial discard from the truck.)
Normal Site Practice - Wheelbarrow filled in 2nd or 3rd.
Step 03
Give a good mix to the concrete in the remixing container/wheel barrow using the square mouthed scoop. (Scoops' square shaped mouth ensures proper mixing of material in the concrete)


Source - BS 1881 : Part 101 : 198
Step 04
Stand on the base pedals of the mould/apparatus, start the stopwatch and start filling the mould/apparatus in 3 layers where, each layer is approximately up to the height of 1/3 of the height of the mould/apparatus.
After placing each layer, 25 blows, uniformly distributed over the cross section area of the concrete, need to be blew using the tampering rod. (To ensure proper compaction)
When Compacting/blowing
1st layer - Make sure the tampering rod does not hit the base plate
2nd and 3rd layers - Compact in a manner which, the tampering rod just penetrates the underlying layer
When filling the 3rd/last layer, make sure to fill concrete up to a height, which exceeds the mould height and start compacting. Excess concrete is to be cut and removed by utilizing a trowel. (Otherwise there could be instances where, presence of insufficient concrete volume in the mould after the compaction or 3rd layer)

Step 05
After removing the excess concrete using a trowel, use the moist cloth to clean up the concrete, surrounding the mould and the base plate.
Step 06
Lift the mould vertically using the handles besides in a period of 2-5 seconds. (This lift needs to be a steady upward lift)

Step 07
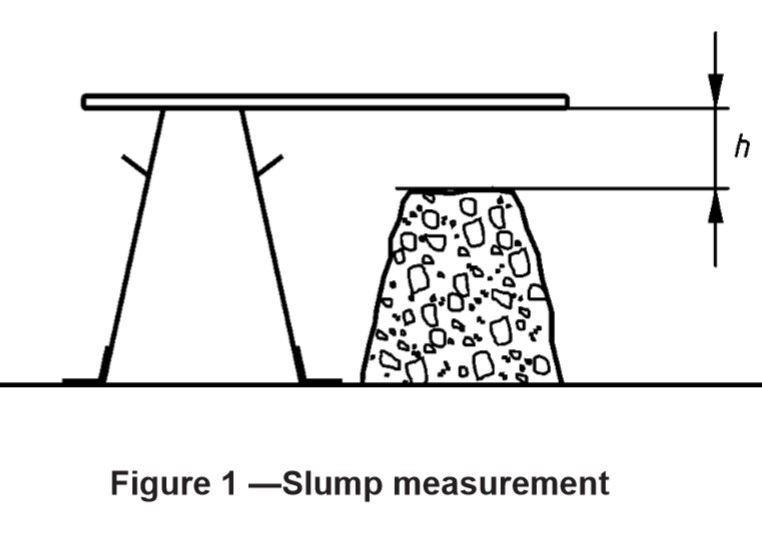
As soon as the mould is being totally lifted, set it aside the concrete heap and place the tampering rod on top of the mould surface, providing a horizontal surface/line.
Then measure the height between the tampering rod and the top most point of the concrete heap, using the meter ruler/tape.
That measurement is known as the slump of the concrete mix.

Source - BS 1881 : Part 101 : 198
(Procedures between step 04 to step 07 need to be undertaken in a time period of 150 seconds.)
Determining the quality of the concrete using the slump
Before a delivery truck leaves the batch mixing plant, an initial slump test is conducted to find the design slump value. Slump value at the site should fall between the range of (Design Slump - 25 mm ) - (Design Slump + 25 mm) for the concrete mix to be approved to be utilized in casting.
According to the slump value, general idea about the workability of the respective concrete can be illustrated as followed,

2. The appearance of the slump also need to be considered prior to the approval of the concrete mix. Between the appearances of proceeded slump tests, there are 4 types which can be identified predominantly.
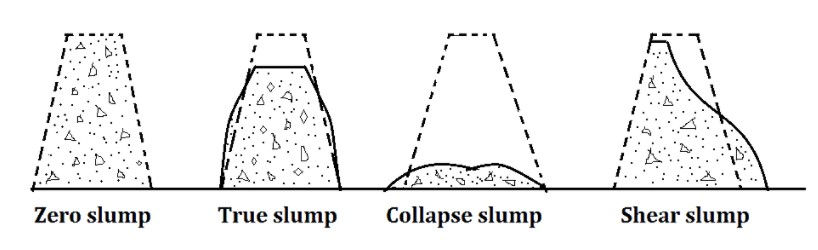
Source - constructionbuzz.in
Slump appearance should represent similarities to a true slump in order to be approved to be used in casting.
Things to Watch Out
1. Do not conduct the slump test if the demoulding of the concrete heap takes place for a more than 1 minute. (Since results are unreliable)
2. Make sure the base plate and mould/apparatus are non absorbent, metal made and should not be readily attacked by cement paste.
3. Interior of the mould need to be smooth and free of rivets, dents, joints, etc.
4. Make sure the recorded maximum aggregate size is below 40 mm.
5. Successful slump varies between the range of 10mm to 210 mm. (Apart from flow concrete) Make sure the recorded slump is in between the above range before proceeding.
6. It is essential to dampen the mould and the base plate prior to the test. (In order to reduce the surface friction)
7. While lifting mould, keeping the lifting action vertical is crucial since, any other lifting movement will result the concrete heap to present a shear slump, Which does not represent the true condition of the concrete
8. Cleaning the base plate and the mould using moist cloth prior to the lifting is also important since, any presence of excess concrete on mould or the base plate could manipulate the true slump value of the concrete mix.
9. Make sure the whole testing operation takes place within 150 seconds.
Following video contains a typical slump test and its' procedure carried out in the sites
References
BS 1881 : Part 101 : 198
BS EN 12350-2:2009


Comments